It is use to get user input through various form element.
All the form element must be written inside <form> tag.
Syntax –
<form>
Form element …
</form>
Different form elements are :-
1) Input tag
It is most commonly used element in form.
Input element can be display in various way which depend on type attribute.
|
Type |
Description |
|
<input type="text"> |
Displays a single-line text input field |
|
<input type="password"> |
Display password input field without showing text |
|
<input type="email"> |
Display a input field which only accept email address like xyz@mail.com |
|
<input type="radio"> |
Displays a radio button (for selecting one of many choices) |
|
<input type="checkbox"> |
Displays a checkbox (for selecting zero or more of many choices) |
|
<input type="submit"> |
Displays a submit button (for submitting the form) |
|
<input type="button"> |
Displays a clickable button |
-
Text type input field
It is use to display text input field.
Syntax –
<input type="text">
For example
<!DOCTYPE html>
<html lang="en">
<head>
<meta charset="UTF-8">
<meta http-equiv="X-UA-Compatible" content="IE=edge">
<meta name="viewport" content="width=device-width, initial-scale=1.0">
<title>Html tutorial</title>
</head>
<body>
<form>
<label>Text field</label>
<input type="text">
</form>
</body>
</html>
Output

-
Password type input field
It is use to display password input field without showing password.
Syntax –
<input type="password">
For example
<!DOCTYPE html>
<html lang="en">
<head>
<meta charset="UTF-8">
<meta http-equiv="X-UA-Compatible" content="IE=edge">
<meta name="viewport" content="width=device-width, initial-scale=1.0">
<title>Html tutorial</title>
</head>
<body>
<form>
<label>Password field</label>
<input type="password">
</form>
</body>
</html>
Output
img
-
Date type input field
It is use to display date.
Syntax –
<input type="date">
For example
<!DOCTYPE html>
<html lang="en">
<head>
<meta charset="UTF-8">
<meta http-equiv="X-UA-Compatible" content="IE=edge">
<meta name="viewport" content="width=device-width, initial-scale=1.0">
<title>Html tutorial</title>
</head>
<body>
<form>
<label>Date input field :</label>
<input type="date">
</form>
</body>
</html>
Output
img
-
File type input field
It is use to insert files like image, pdf etc.
We can use multiple attribute to select multiple file.
Syntax –
<input type="file">
For example
<!DOCTYPE html>
<html lang="en">
<head>
<meta charset="UTF-8">
<meta http-equiv="X-UA-Compatible" content="IE=edge">
<meta name="viewport" content="width=device-width, initial-scale=1.0">
<title>Html tutorial</title>
</head>
<body>
<form>
<label>File input field :</label>
<input type="file">
</form>
</body>
</html>
Output
img
- hidden type input field
It is use to hide input field from web browser.
It’s basically used when we need to send anything using php in another page without showing on browser.
We will see use of hidden type input in php tutorial.
Syntax –
<input type="hidden">
For example
<!DOCTYPE html>
<html lang="en">
<head>
<meta charset="UTF-8">
<meta http-equiv="X-UA-Compatible" content="IE=edge">
<meta name="viewport" content="width=device-width, initial-scale=1.0">
<title>Html tutorial</title>
</head>
<body>
<form>
<label>hidden input field :</label>
<input type="hidden">
</form>
</body>
</html>
Output
No visible output
- Month type input field
It is use to display month only.
Syntax –
<input type="image">
For example
<!DOCTYPE html>
<html lang="en">
<head>
<meta charset="UTF-8">
<meta http-equiv="X-UA-Compatible" content="IE=edge">
<meta name="viewport" content="width=device-width, initial-scale=1.0">
<title>Html tutorial</title>
</head>
<body>
<form>
<label>Month input field :</label>
<input type="month">
</form>
</body>
</html>
Output
img
-
Number type input field
It is use to display number only.
Syntax –
<input type="number">
For example
<!DOCTYPE html>
<html lang="en">
<head>
<meta charset="UTF-8">
<meta http-equiv="X-UA-Compatible" content="IE=edge">
<meta name="viewport" content="width=device-width, initial-scale=1.0">
<title>Html tutorial</title>
</head>
<body>
<form>
<label>Number input field :</label>
<input type="number">
</form>
</body>
</html>
Output

- Email type input field
It is only accept email address.
Syntax –
<input type="email">
For example
<!DOCTYPE html>
<html lang="en">
<head>
<meta charset="UTF-8">
<meta http-equiv="X-UA-Compatible" content="IE=edge">
<meta name="viewport" content="width=device-width, initial-scale=1.0">
<title>Html tutorial</title>
</head>
<body>
<form>
<label>Email field</label>
<input type="email">
</form>
</body>
</html>
Output
img
-
Radio button type input field
Using radio button user can select only one field.
Syntax –
<input type="radio">
For example
<!DOCTYPE html>
<html lang="en">
<head>
<meta charset="UTF-8" />
<meta http-equiv="X-UA-Compatible" content="IE=edge" />
<meta name="viewport" content="width=device-width, initial-scale=1.0" />
<title>Html tutorial</title>
</head>
<body>
<p>Choose one online learning plateform</p>
<form>
<input type="radio" id="Teknowize" value="Teknowize" name="online_tutorial"/>
<label for="Teknowize">Teknowize</label><br />
<input type="radio" id="w3school" value="w3school" name="online_tutorial" />
<label for="w3school">W3school</label><br />
<input type="radio" id="tutorialspoint" value="tutorialspoint" name="online_tutorial"/>
<label for="tutorialspoint">tutorialspoint</label>
<form>
</body>
</html>
Output

-
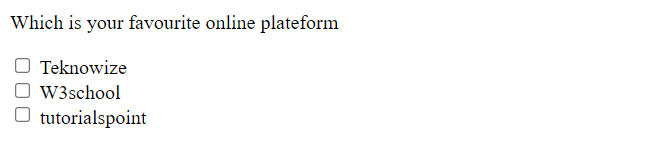
Checkboxes type input field
Using checkbox user can select one or more fields.
Syntax –
<input type="checkbox">
For example
<!DOCTYPE html>
<html lang="en">
<head>
<meta charset="UTF-8" />
<meta http-equiv="X-UA-Compatible" content="IE=edge" />
<meta name="viewport" content="width=device-width, initial-scale=1.0" />
<title>Html tutorial</title>
</head>
<body>
<p>Which is your favourite online plateform</p>
<form>
<input type="checkbox" id="Teknowize" value="Teknowize" name="Teknowize"/>
<label for="Teknowize">Teknowize</label><br />
<input type="checkbox" id="w3school" value="w3school" name="w3school" />
<label for="w3school">W3school</label><br />
<input type="checkbox" id="tutorialspoint" value="tutorialspoint" name="tutorialspoint"/>
<label for="tutorialspoint">tutorialspoint</label>
<form>
</body>
</html>
Output
-
Submit button type input field
Using submit button you can submit your form.
Syntax –
<input type="submit">
For example
<!DOCTYPE html>
<html lang="en">
<head>
<meta charset="UTF-8" />
<meta http-equiv="X-UA-Compatible" content="IE=edge" />
<meta name="viewport" content="width=device-width, initial-scale=1.0" />
<title>Html tutorial</title>
</head>
<body>
<p>Which is your favourite online plateform</p>
<form>
<input type="checkbox" id="Teknowize" value="Teknowize" name="Teknowize"/>
<label for="Teknowize">Teknowize</label><br />
<input type="checkbox" id="w3school" value="w3school" name="w3school" />
<label for="w3school">W3school</label><br />
<input type="checkbox" id="tutorialspoint" value="tutorialspoint" name="tutorialspoint"/>
<label for="tutorialspoint">tutorialspoint</label> <br>
<input type="submit" value="submit">
</form>
</body>
</html>
Output

-
Clickable button type input field
It just work like a button.
Syntax –
<input type="button">
For example
<!DOCTYPE html>
<html lang="en">
<head>
<meta charset="UTF-8" />
<meta http-equiv="X-UA-Compatible" content="IE=edge" />
<meta name="viewport" content="width=device-width, initial-scale=1.0" />
<title>Html tutorial</title>
</head>
<body>
<p>Which is your favourite online plateform</p>
<form>
<input type="checkbox" id="Teknowize" value="Teknowize" name="Teknowize"/>
<label for="Teknowize">Teknowize</label><br />
<input type="checkbox" id="w3school" value="w3school" name="w3school" />
<label for="w3school">W3school</label><br />
<input type="checkbox" id="tutorialspoint" value="tutorialspoint" name="tutorialspoint"/>
<label for="tutorialspoint">tutorialspoint</label> <br>
<input type="button" value="button">
</form>
</body>
</html>
Output

-
Range type input field
It is use to select range between given range in max and min attribute and also have a step attribute to add number of steps.
By default range is 0 to 100.
Syntax –
<input type="range">
For example
<!DOCTYPE html>
<html lang="en">
<head>
<meta charset="UTF-8">
<meta http-equiv="X-UA-Compatible" content="IE=edge">
<meta name="viewport" content="width=device-width, initial-scale=1.0">
<title>Html tutorial</title>
</head>
<body>
<form>
<label>Range input field :</label>
<input type="range" min="10" max="200">
</form>
</body>
</html>
Output

-
Reset type input field
It’s like a button but it is use to reset all form input fields.
Syntax –
<input type="reset">
For example
<!DOCTYPE html>
<html lang="en">
<head>
<meta charset="UTF-8">
<meta http-equiv="X-UA-Compatible" content="IE=edge">
<meta name="viewport" content="width=device-width, initial-scale=1.0">
<title>Html tutorial</title>
</head>
<body>
<form>
<label>Reset input field :</label>
<input type="reset">
<form>
</body>
</html>
Output

-
Week type input field
It is use to display week only.
Syntax –
<input type="week">
For example
<!DOCTYPE html>
<html lang="en">
<head>
<meta charset="UTF-8">
<meta http-equiv="X-UA-Compatible" content="IE=edge">
<meta name="viewport" content="width=device-width, initial-scale=1.0">
<title>Html tutorial</title>
</head>
<body>
<form>
<label>Week input field :</label>
<input type="week">
</form>
</body>
</html>
Output

-
URL type input field
It is use to display url only.
Syntax –
<input type="url">
For example
<!DOCTYPE html>
<html lang="en">
<head>
<meta charset="UTF-8">
<meta http-equiv="X-UA-Compatible" content="IE=edge">
<meta name="viewport" content="width=device-width, initial-scale=1.0">
<title>Html tutorial</title>
</head>
<body>
<form>
<label>URL input field :</label>
<input type="url">
</form>
</body>
</html>
Output

-
Time type input field
It is use to display time only.
Syntax –
<input type="time">
For example
<!DOCTYPE html>
<html lang="en">
<head>
<meta charset="UTF-8">
<meta http-equiv="X-UA-Compatible" content="IE=edge">
<meta name="viewport" content="width=device-width, initial-scale=1.0">
<title>Html tutorial</title>
</head>
<body>
<form>
<label>Time input field :</label>
<input type="time">
</form>
</body>
</html>
Output

-
Value input attribute
It is use to display default value to input field.
Syntax –
<input type="time">
For example
<!DOCTYPE html>
<html lang="en">
<head>
<meta charset="UTF-8">
<meta http-equiv="X-UA-Compatible" content="IE=edge">
<meta name="viewport" content="width=device-width, initial-scale=1.0">
<title>Html tutorial</title>
</head>
<body>
<form>
<label>Value input attribute :</label>
<input type="text" value="Teknowize">
</form>
</body>
</html>
Output

-
Readonly input attribute
If we use readonly attribute then the input field not be editable.
Syntax –
<input type="text" readonly>
For example
<!DOCTYPE html>
<html lang="en">
<head>
<meta charset="UTF-8">
<meta http-equiv="X-UA-Compatible" content="IE=edge">
<meta name="viewport" content="width=device-width, initial-scale=1.0">
<title>Html tutorial</title>
</head>
<body>
<form>
<label>Readonly input attribute :</label>
<input type="text" value="Teknowize" readonly >
</form>
</body>
</html>
Output

-
Disabled input attribute
If we use disabled attribute then work line readonly attribute but it not clickable like readonly attribute.
Syntax –
<input type="text" disabled>
For example
<!DOCTYPE html>
<html lang="en">
<head>
<meta charset="UTF-8">
<meta http-equiv="X-UA-Compatible" content="IE=edge">
<meta name="viewport" content="width=device-width, initial-scale=1.0">
<title>Html tutorial</title>
</head>
<body>
<form>
<label>Disabled input attribute :</label> <br><br>
<input type="text" value="Teknowize" disabled> <br><br>
<input type="text" value="India">
</form>
</body>
</html>
Output

-
Multiple input attribute
It is always use with file input type to select multiple files.
Syntax –
<input type="file" multiple >
For example
<!DOCTYPE html>
<html lang="en">
<head>
<meta charset="UTF-8">
<meta http-equiv="X-UA-Compatible" content="IE=edge">
<meta name="viewport" content="width=device-width, initial-scale=1.0">
<title>Html tutorial</title>
</head>
<body>
<form>
<label>Multiple input attribute :</label> <br><br>
<input type="file" multiple> <br>
</form>
</html>
Output

-
Placeholder input attribute
It is a short description which use to describe about input field.
Syntax –
<input type="text" placeholder="" >
For example
<!DOCTYPE html>
<html lang="en">
<head>
<meta charset="UTF-8">
<meta http-equiv="X-UA-Compatible" content="IE=edge">
<meta name="viewport" content="width=device-width, initial-scale=1.0">
<title>Html tutorial</title>
</head>
<body>
<form>
<label>Placeholder input attribute :</label>
<input type="text" placeholder="put your name here">
</form>
</html>
Output

-
Required input attribute
It specifies that the input field where required attributes used must be filled before form submission.
Syntax –
<input type="text" required >
For example
<!DOCTYPE html>
<html lang="en">
<head>
<meta charset="UTF-8">
<meta http-equiv="X-UA-Compatible" content="IE=edge">
<meta name="viewport" content="width=device-width, initial-scale=1.0">
<title>Html tutorial</title>
</head>
<body>
<form>
<label>required input attribute :</label>
<input type="text" required>
<input type="submit">
</form>
</html>
Output

-
Autofocus input attribute
It specifies that an field automatically focused after full page is loaded.
Syntax –
<input type="text" autofocus >
For example
<!DOCTYPE html>
<html lang="en">
<head>
<meta charset="UTF-8">
<meta http-equiv="X-UA-Compatible" content="IE=edge">
<meta name="viewport" content="width=device-width, initial-scale=1.0">
<title>Html tutorial</title>
</head>
<body>
<form>
<label>Autofocus input attribute :</label>
<input type="text" autofocus>
</form>
</html>
Output

2) Label tag
It is use to define label of different form elements.
Syntax –
<label> <label>
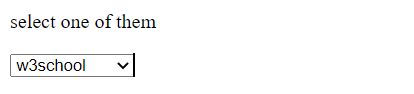
3) Select tag
It is use to select one of the many option from a dropdown list
In this we need to use <option> tag inside select tag to write all the options.
We can also use selected attribute in <option> tag to select any option by default.
Syntax –
<select>
<option> </option>
<option> </option>
</select>
For example
<!DOCTYPE html>
<html lang="en">
<head>
<meta charset="UTF-8" />
<meta http-equiv="X-UA-Compatible" content="IE=edge" />
<meta name="viewport" content="width=device-width, initial-scale=1.0" />
<title>Html tutorial</title>
</head>
<body>
<p>select one of them</p>
<form>
<select name="learn">
<option value="teknowize">teknowize</option>
<option selected value="w3school">w3school</option>
<option value="codepen">codepen</option>
<option value="tutorialspoint">tutorialspoint</option>
</select>
</form>
</body>
</html>
Output
4) Text area
It is use write multi line text.
The rows attribute specifies the number of lines in a text area.
The cols attribute specifies width of a text area.
Syntax –
<textarea> </ textarea >
For example
<!DOCTYPE html>
<html lang="en">
<head>
<meta charset="UTF-8" />
<meta http-equiv="X-UA-Compatible" content="IE=edge" />
<meta name="viewport" content="width=device-width, initial-scale=1.0" />
<title>Html tutorial</title>
</head>
<body>
<p>Text Area</p>
<form>
<textarea name="bio" id="" cols="50" rows="5"></textarea>
</form>
</body>
</html>
Output

5) Button
It is use create clickable button.
Syntax –
<button> </ button >
For example
<!DOCTYPE html>
<html lang="en">
<head>
<meta charset="UTF-8" />
<meta http-equiv="X-UA-Compatible" content="IE=edge" />
<meta name="viewport" content="width=device-width, initial-scale=1.0" />
<title>Html tutorial</title>
</head>
<body>
<p>Button</p>
<form>
<button>button</button>
</form>
</body>
</html>
Output

6) The fieldset and legend
The <fieldset> element is used to group related data in a form.
The <legend> element is use to defines a caption for the <fieldset> element.
Syntax –
<fieldset> </ fieldset >
< legend > </ legend >
For example
<!DOCTYPE html>
<html lang="en">
<head>
<meta charset="UTF-8">
<meta http-equiv="X-UA-Compatible" content="IE=edge">
<meta name="viewport" content="width=device-width, initial-scale=1.0">
<title>Html Tutorial</title>
</head>
<body>
<form action="/action_page.php">
<fieldset>
<legend>Student details:</legend>
<label for="fname">First name:</label><br>
<input type="text" id="fname" name="fname" value="teknowize"><br>
<label for="lname">Last name:</label><br>
<input type="text" id="lname" name="lname" value="india"><br><br>
<input type="submit" value="Submit">
</fieldset>
</form>
</body>
</html>
Output

7) Datalist
It is use to choose one of the many option from a dropdown predefined list.
In this we need to use <option> tag inside datalist tag to write all the options.
Syntax –
<datalist>
<option> </option>
<option> </option>
</ datalist >
For example
<!DOCTYPE html>
<html lang="en">
<head>
<meta charset="UTF-8">
<meta http-equiv="X-UA-Compatible" content="IE=edge">
<meta name="viewport" content="width=device-width, initial-scale=1.0">
<title>Html Tutorial</title>
</head>
<body>
<form>
<input list="tutorial">
<datalist id="tutorial">
<option value="Teknowize">
<option value="w3school">
<option value="tutorial">
</datalist>
</form>
</body>
</html>
Output
